
Ubuntuでは、UVC(USB Video Class)対応のWebカメラであれば、標準のドライバーで問題なく動作するようです。そこで、ROSでWebカメラ画像を表示してみます。
ROS上で確認する前に、Ubuntu上でWebカメラが使えるかの確認と、設定可能な解像度やフレームレートなどの値の確認のため、cheese、v4l-tools(Video for Linux Tools)、qv4l2(Qt Video for Linux 2)をインストールします。
$ sudo apt install cheese v4l-utils qv4l2
Videoデータを扱う場合には、videoグループに入る必要があります。下記の例では、joeというユーザをvideoグループに入れています。
$ sudo usermod -a -G video joe
$ cat /etc/group | grep video
video:x:44:joe
Webカメラを接続したら、cheeseを起動します。私の環境では、ノートパソコン(DellのInspiron)内蔵のWebカメラも、USB接続したWebカメラ(ELECOMのUCAM-C0220FB)も、接続するだけで、Webカメラの映像を表示できました。Webカメラの切り替えは、cheeseの設定メニューの「ウェブカム」タグの「デバイス」で切り替えることができます。
$ cheese
次のような画面でWebカメラの映像が表示されます。
端末を開き、Webカメラのデバイスの確認を行います。
デバイスの一覧と、videoグループにアクセス権が設定されていることが確認できます。
$ ls -l /dev/video*
crw-rw----+ 1 root video 81, 0  4月 19 15:53 /dev/video0
crw-rw----+ 1 root video 81, 1  4月 19 15:53 /dev/video1
crw-rw----+ 1 root video 81, 2  4月 19 15:53 /dev/video2
Webカメラの詳細情報を表示してみます。
$ v4l2-ctl -d /dev/video0 --all
Driver Info (not using libv4l2):
	Driver name   : uvcvideo
	Card type     : Integrated_Webcam_HD: Integrate
	Bus info      : usb-0000:00:14.0-5
	Driver version: 4.15.18
	Capabilities  : 0x84200001
		Video Capture
		Streaming
		Extended Pix Format
		Device Capabilities
	Device Caps   : 0x04200001
		Video Capture
		Streaming
		Extended Pix Format
Priority: 2
Video input : 0 (Camera 1: ok)
Format Video Capture:
	Width/Height      : 640/480
	Pixel Format      : 'YUYV'
	Field             : None
	Bytes per Line    : 1280
	Size Image        : 614400
	Colorspace        : sRGB
	Transfer Function : Default (maps to sRGB)
	YCbCr/HSV Encoding: Default (maps to ITU-R 601)
	Quantization      : Default (maps to Limited Range)
	Flags             :
Crop Capability Video Capture:
	Bounds      : Left 0, Top 0, Width 640, Height 480
	Default     : Left 0, Top 0, Width 640, Height 480
	Pixel Aspect: 1/1
Selection: crop_default, Left 0, Top 0, Width 640, Height 480
Selection: crop_bounds, Left 0, Top 0, Width 640, Height 480
Streaming Parameters Video Capture:
	Capabilities     : timeperframe
	Frames per second: 30.000 (30/1)
	Read buffers     : 0
                     brightness 0x00980900 (int)    : min=-64 max=64 step=1 default=0 value=0
                       contrast 0x00980901 (int)    : min=0 max=95 step=1 default=0 value=0
                     saturation 0x00980902 (int)    : min=0 max=100 step=1 default=64 value=64
                            hue 0x00980903 (int)    : min=-2000 max=2000 step=1 default=0 value=0
 white_balance_temperature_auto 0x0098090c (bool)   : default=1 value=1
                          gamma 0x00980910 (int)    : min=100 max=300 step=1 default=100 value=100
                           gain 0x00980913 (int)    : min=1 max=8 step=1 default=1 value=1
           power_line_frequency 0x00980918 (menu)   : min=0 max=2 default=2 value=2
      white_balance_temperature 0x0098091a (int)    : min=2800 max=6500 step=10 default=4600 value=4600 flags=inactive
                      sharpness 0x0098091b (int)    : min=1 max=7 step=1 default=2 value=2
         backlight_compensation 0x0098091c (int)    : min=0 max=3 step=1 default=3 value=3
                  exposure_auto 0x009a0901 (menu)   : min=0 max=3 default=3 value=3
              exposure_absolute 0x009a0902 (int)    : min=10 max=625 step=1 default=156 value=156 flags=inactive
         exposure_auto_priority 0x009a0903 (bool)   : default=0 value=1
Webカメラがサポートしている映像形式、解像度、フレームレートなどの表示をしてみます。
$ v4l2-ctl -d /dev/video0 --list-formats-ext
ioctl: VIDIOC_ENUM_FMT
	Index       : 0
	Type        : Video Capture
	Pixel Format: 'MJPG' (compressed)
	Name        : Motion-JPEG
		Size: Discrete 1280x720
			Interval: Discrete 0.033s (30.000 fps)
		Size: Discrete 960x540
			Interval: Discrete 0.033s (30.000 fps)
		Size: Discrete 848x480
			Interval: Discrete 0.033s (30.000 fps)
		Size: Discrete 640x480
			Interval: Discrete 0.033s (30.000 fps)
		Size: Discrete 640x360
			Interval: Discrete 0.033s (30.000 fps)

	Index       : 1
	Type        : Video Capture
	Pixel Format: 'YUYV'
	Name        : YUYV 4:2:2
		Size: Discrete 640x480
			Interval: Discrete 0.033s (30.000 fps)
		Size: Discrete 640x360
			Interval: Discrete 0.033s (30.000 fps)
		Size: Discrete 424x240
			Interval: Discrete 0.033s (30.000 fps)
		Size: Discrete 320x240
			Interval: Discrete 0.033s (30.000 fps)
		Size: Discrete 320x180
			Interval: Discrete 0.033s (30.000 fps)
		Size: Discrete 160x120
			Interval: Discrete 0.033s (30.000 fps)
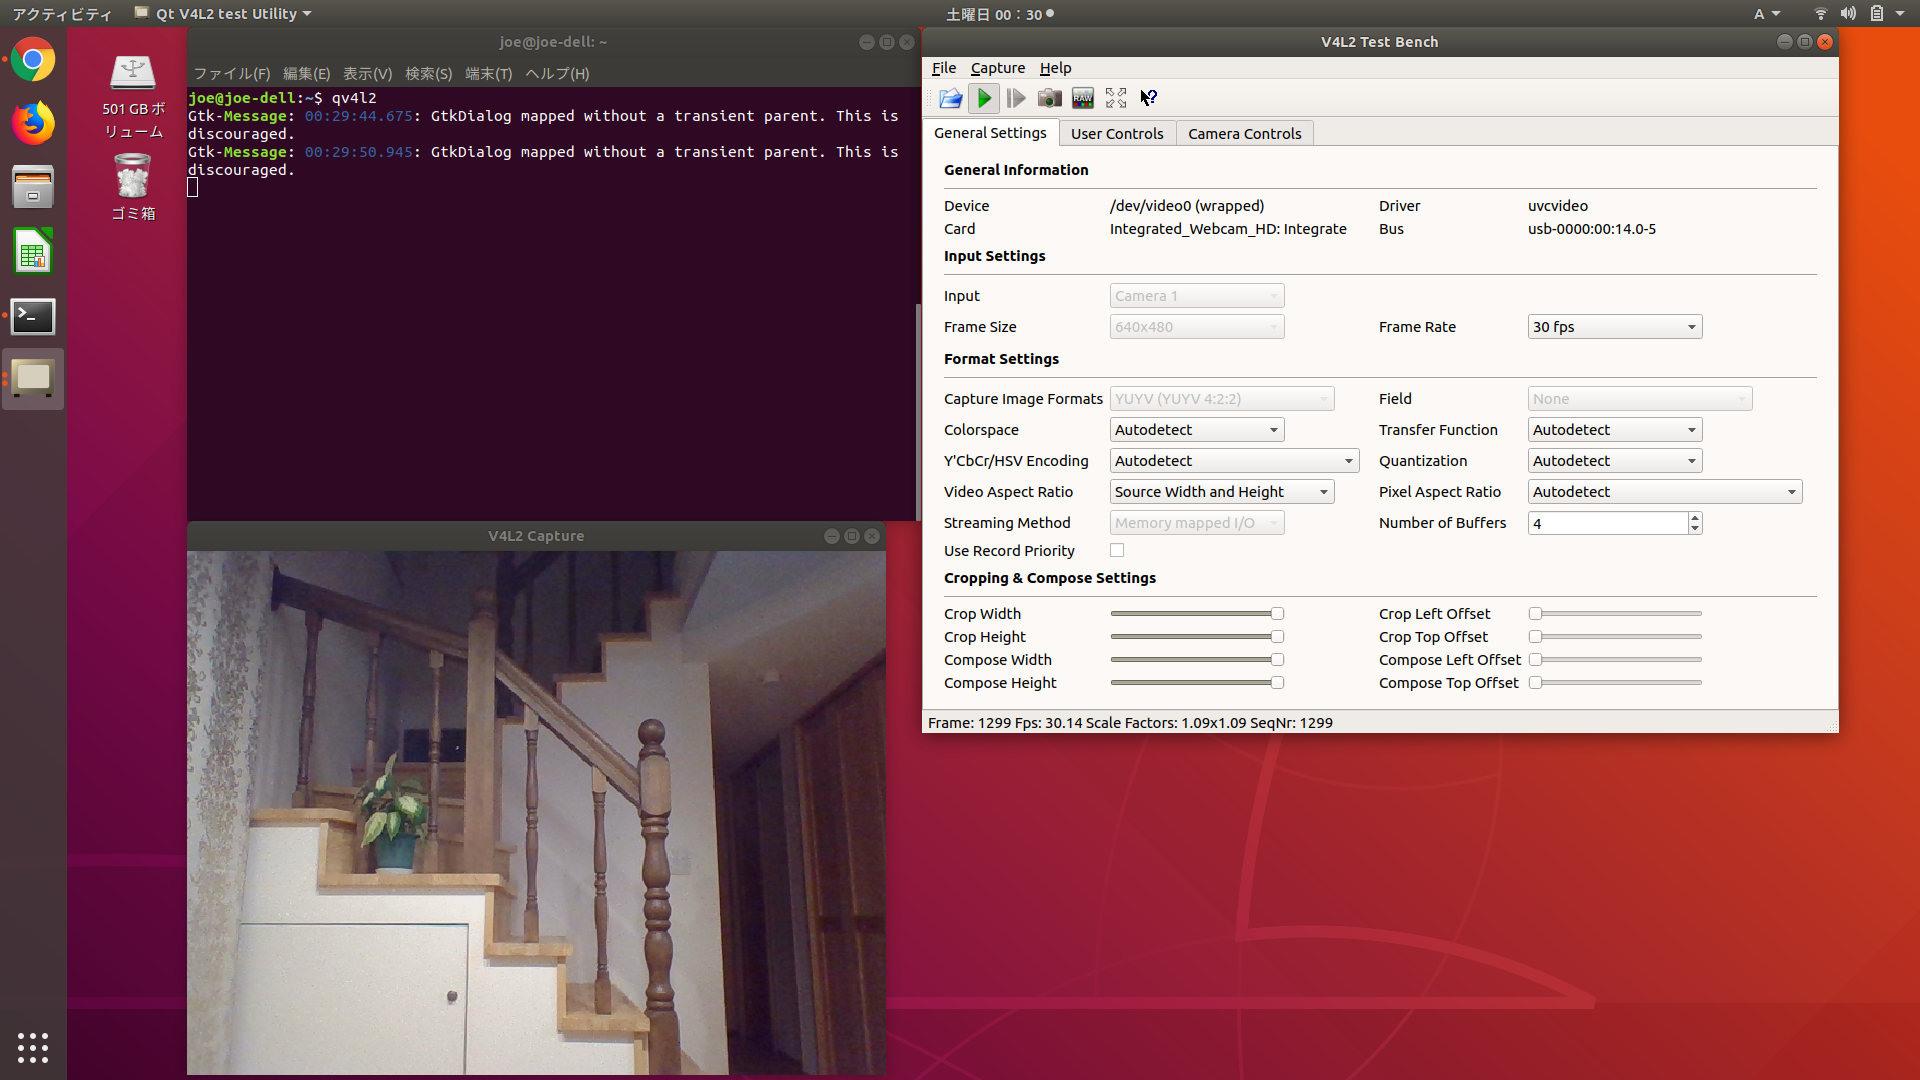
qv4l2を使って、Webカメラの画像を表示してみます。
$ qv4l2
画面上部にある三角のボタンを押すと、次のような画面でWebカメラの映像が表示されます。
ROSのuvc-cameraパッケージで画像データを配信します。uvc_cameraパッケージや、rqt_image_viewパッケージは、ROSをdesktop_fullでインストールしていれば、標準で入っています。ROSには、usb-camパッケージもありますが、こちらは動作しませんでした。
$ roscore &
$ rosrun uvc_camera uvc_camera_node
rostopicコマンドで、配信されているTopic名を確認します。
$ rostopic list
/camera_info
/image_raw
/image_raw/compressed
/image_raw/compressed/parameter_descriptions
/image_raw/compressed/parameter_updates
/image_raw/compressedDepth
/image_raw/compressedDepth/parameter_descriptions
/image_raw/compressedDepth/parameter_updates
/image_raw/theora
/image_raw/theora/parameter_descriptions
/image_raw/theora/parameter_updates
/rosout
/rosout_agg
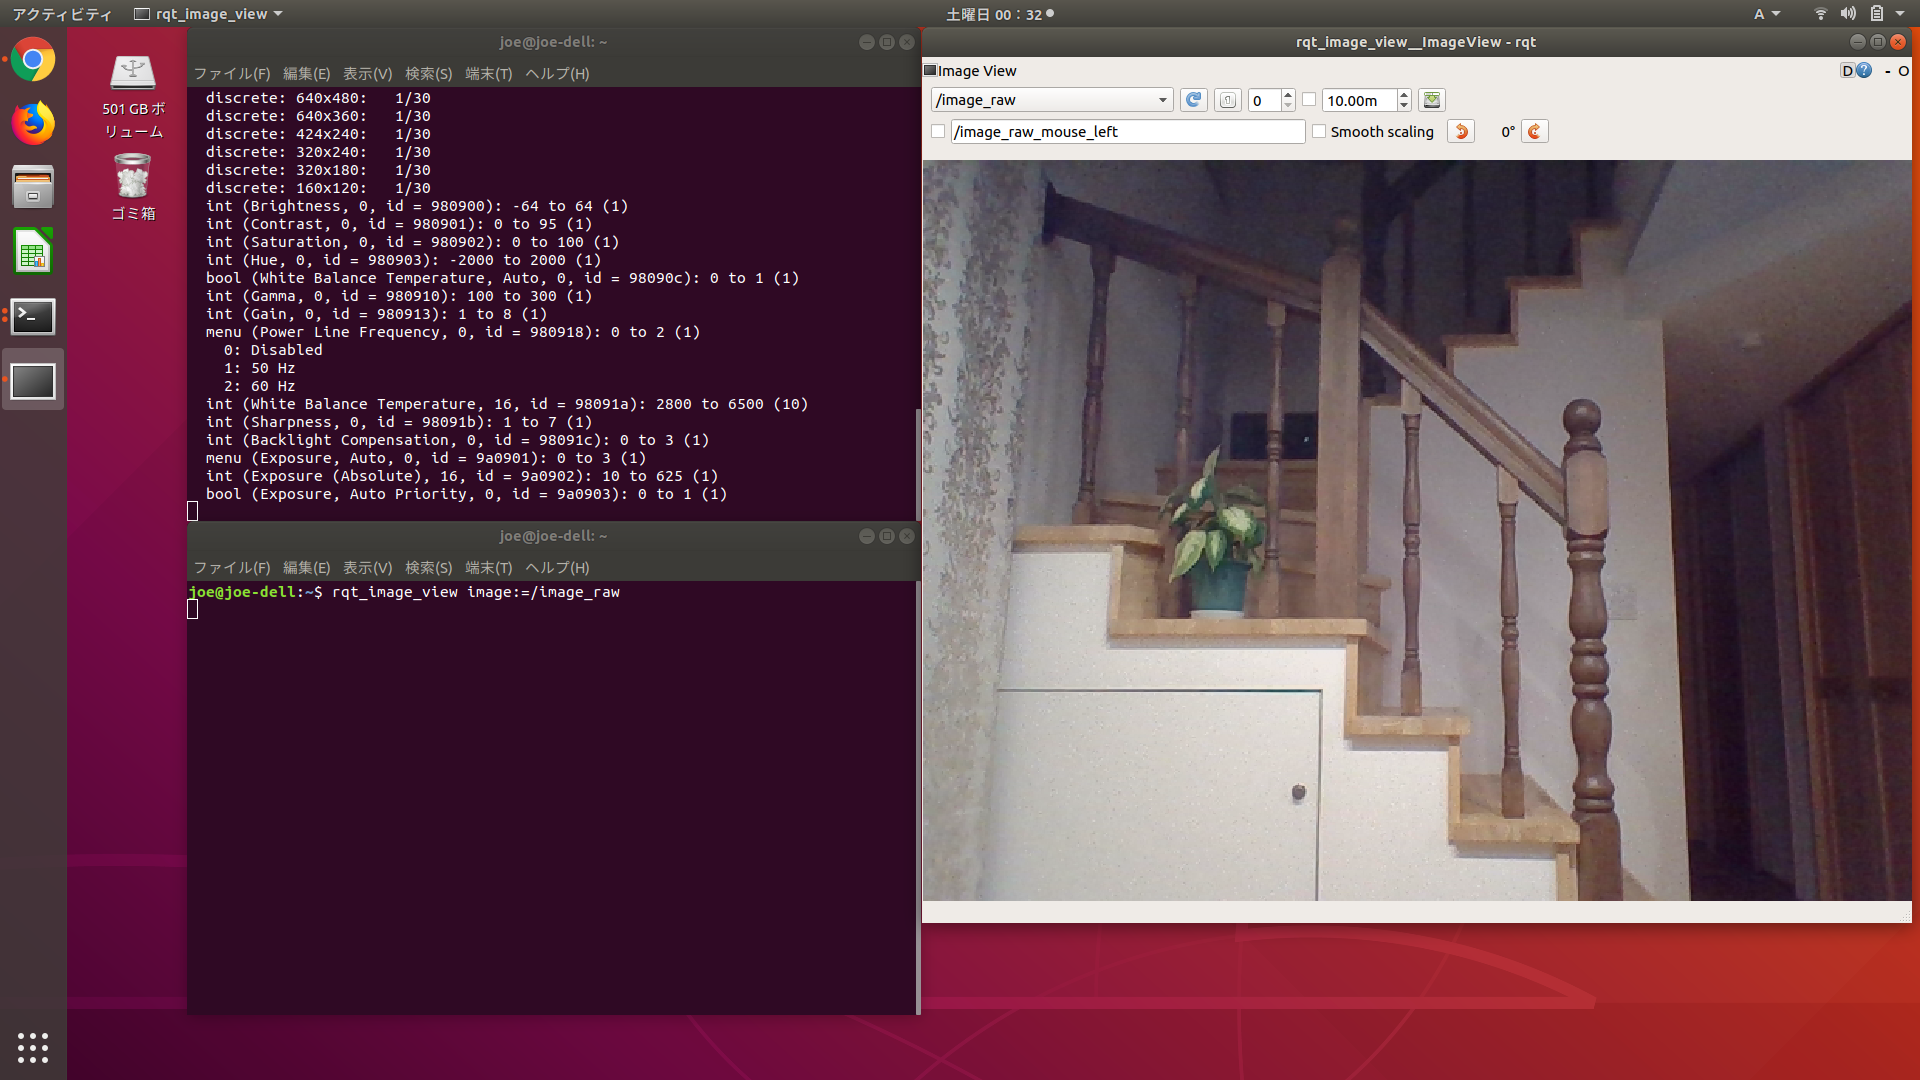
/image_rawが、Webカメラの画像データを配信しているTopicです。
これをrqt_image_viewで確認します。
$ rqt_image_view
起動時に「image:=/image_raw」という引数で指定する方法もありますが、起動後にコンボボックスで「/image_raw」を選択すれば、次のような画面でWebカメラの映像が表示されます。これは、ROSの/image_rawのTopicを購読した結果を表示しています。
同じ画像をrvizを使っても、確認することができます。
$ rviz
rvizが起動したら、Displaysの「Add」で「Image」を追加します。
Displaysの「Image」の「Topic」に「/image_raw」を設定すると、左下のimageパネルにWebカメラの映像が表示されます。
